
In March, 2014, I published an e-book, Step Out in Style, with 40 new tangle patterns - mostly my own, but also with contributions from other CZTs. The book has been very well received, and I'd like to thank those of you who have purchased it. I called it Volume 1, leaving the door open for me to possibly do a Volume 2. For the last year and a half I have thought about it, and finally came to the decision that I will NOT be creating another volume. However, I do enjoy coming up with new patterns, or at least what I think are new patterns, as there are SO many out there that I can never be sure.
So... from time to time I'll be blogging about a pattern for which I've created the step-outs. Today is the first one. This pattern begins like Beeline, a pattern from Rick Roberts and Maria Thomas, founders of the Zentangle Method. But in the end, it looks totally different. I love patterns with lots of repetitive lines, and if you are a fan of those patterns also, I think you'll enjoy this one. Of course I'm hoping that you all like it, even if you're not crazy about lines like I am.
I've decided to call it Zigbee. Zig for the zig zag lines, and bee for the fact that it begins like Beeline. Here are my step-outs.

- In step #3, after you have drawn your first column of diamonds, move over to leave some space, and aura the the right side of your diamond. Do NOT draw your next column of diamonds right next to the first one. Remember to do that after each column of diamonds.
- In step #7 I show one way to shade Zigbee, but you may find your own way of shading that you like better. Sometimes shading can totally change the look of a tangle.
- In step #8 I show a tangleation (variation) of Zigbee. Notice that I have drawn the lines in the spaces surrounding the diamonds in different directions. This brings out the star shapes in the pattern, which I have heavily shaded here to make it easy for you to see.
Here's one on a zendala that I colored using Ranger distress ink pads. In case you're interested, my colored tiles are for sale in my Etsy shop. This is the unshaded tile, showing two variations of Zigbee that look a bit different because I chose to blacken different areas.

This is what it looks like after being shaded.
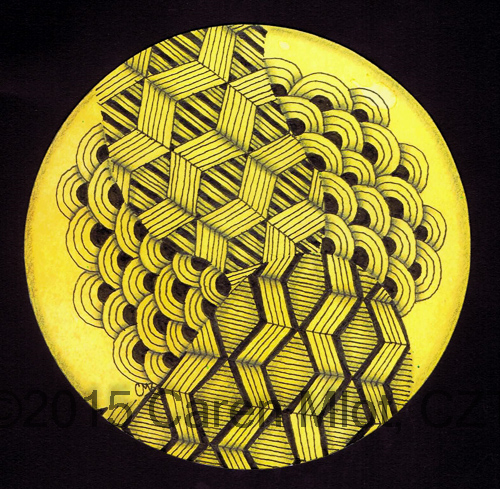
The next one shows how to make star shapes really pop out by drawing the lines as shown in my tangleation in the step-outs, as well as creating black stripes in the stars. Notice that on the left side of the tile I used all straight lines, and on the right side I curved the lines to make it puffy looking.

In the tile below, I again drew the lines as in my tangleation, but this time just used shading to make the stars (partial stars) pop a little. This is one where your eyes can really play tricks on you. Focus on the tile one way and you will see the stars pop, but keep looking and your focus may change so that you see cubes popping out instead.


And there you have it - Zigbee! I hope you enjoy the pattern. Have fun playing, and I'd love to see what you create with it.
Terrifically informative - thank you so much.
ReplyDeletePaula (PEP)
Beautiful Caren! I especially love that second last tile....I too like those 'optical illusions' that truly add the Wow factor :-)
ReplyDelete